


How to use heat shrink tubing? From application to securing | WKK
Posted on 4 August 2025
Connecting cables with the help of heat shrink tubing is a widely used method to insulate, protect, and reinforce electrical connections. Whether you’re working on a DIY project, performing a repair, or making a professional installation, heat shrink tubing provides a safe and durable solution.
In this blog, we’ll explain how to use heat shrink tubing and how to connect cables step by step with heat shrink tubing.
How to connect cables with heat shrink tubing?
You connect cables with heat shrink tubing by stripping the cables, joining them together, and then applying the tubing. Below, we will explain the process step by step.
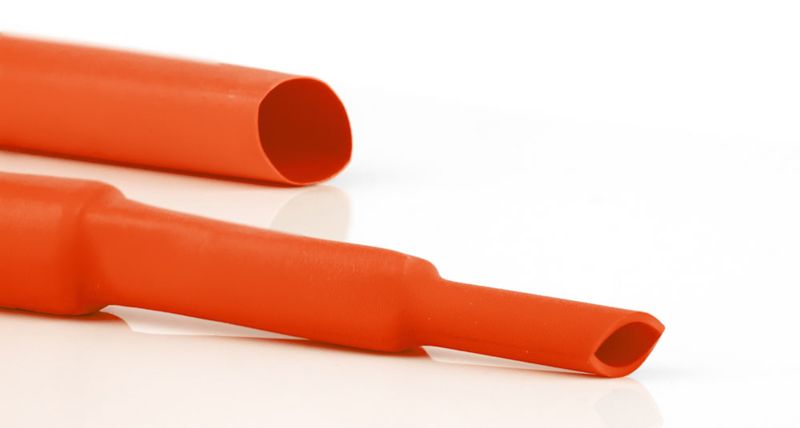
1. Choose the right size of heat shrink tubing
The diameter of the tubing should, in its shrunk state, be slightly smaller than the diameter of the cable. Also, pay attention to the shrink ratio – for example 2:1 or 3:1 – which indicates how much the tubing will shrink.
2. Slide the tubing over one of the cables
Before joining the cables together, slide the tubing onto one of the ends. This prevents you from forgetting it once the connection is made.
3. Strip the cables
Use a wire stripper to remove a small section of insulation (usually 5–10 mm) from both cables. Make sure not to damage the copper strands.
4. Connect the cables
Join the cables together, for example by twisting and soldering them, or by using a solder connector or clamp. Ensure the connection is solid and electrically conductive.
5. Slide the tubing over the connection
Make sure the tubing covers the entire connection, including a small section of insulation on both sides for extra protection.
6. Evenly heat the tubing
Use a heat gun to heat the tubing evenly. Move the tool back and forth slowly to avoid damaging the cable or the tubing. The tubing will shrink tightly around the connection. Some variants contain an adhesive lining that melts for extra sealing.
7. Let it cool and check the connection
Allow the connection to cool down. If necessary, check with a multimeter to ensure proper contact. The cables are now firmly and safely insulated.
How to apply heat shrink tubing?
You apply heat shrink tubing by shrinking it with heat. Slide the tubing over the cable, heat it with a heat gun or another heat source, and the tubing will shrink onto the cable. Make sure you choose the right diameter and heat it evenly. This way, you achieve the best result.
Are you unsure of which type or size heat shrink tubing best fits your intended use? Our advisors are at your disposal for tailored advice. Contact them directly.
Also have a look at

WKK chooses FibreStrap: a sustainable solution
Sustainability isn’t in words. It’s in the choices you make as a company.
Everything about bracket holders and types of brackets
In our assortment, you will find a broad range of bracket and clips, such as pipe clips and cable clamps. Read more about the differences between t...